Hello
It’s time for something more informative than usual portion of photos. It’s our first tutorial, so please don’t spare us your criticism. :)
I broke down this process to 7 steps and I’ll explain every one basing on according WiP photos.
I assumed that you know some basic, but if you’ll have some questions feel free to ask.
Blood Angels Power Armour:
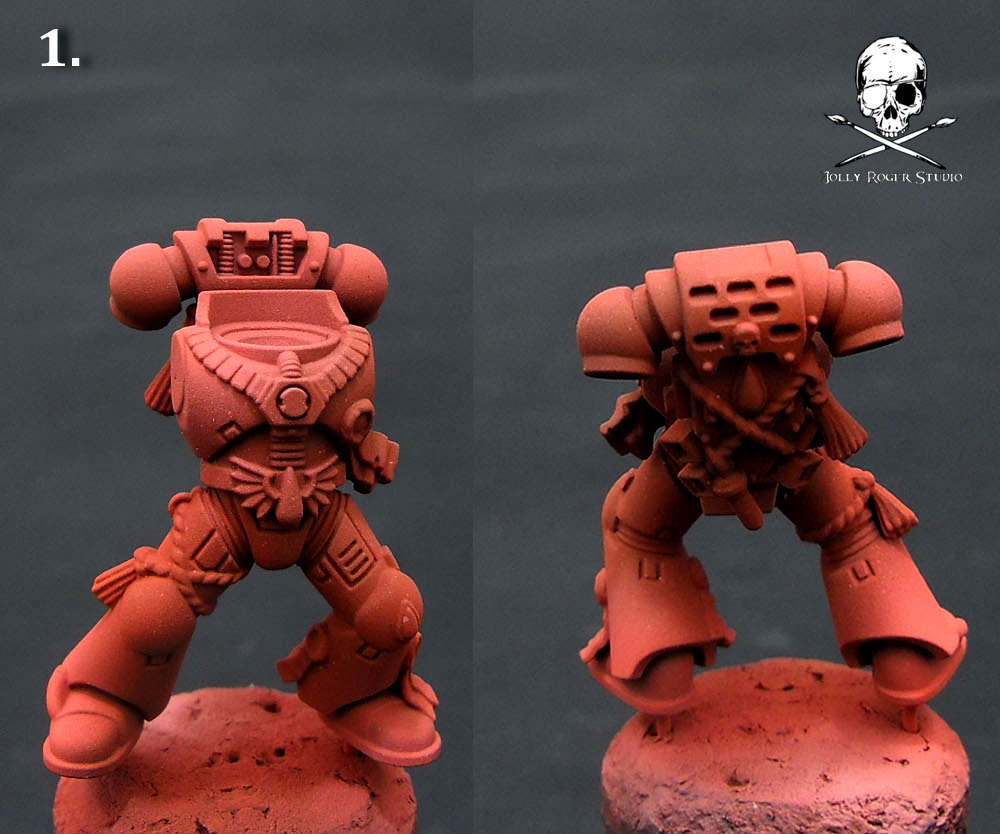
Phase one:
First step is about base coating. The best way to do this is to use airbrush, especially working with red colours. It’s really ungrateful colour to paint it with brush.
I made base coat with Napoleonic Red (Andera Paints) and few highlights with mix of Napoleonic Red and White. At this point whole miniature can look a little pinkish. Easy way to overcome this is to make all necessary highlight a little brighter than intended and at the end just add one coat of diluted base red colour. It will make miniature look more red than pink without losing desired highlights.
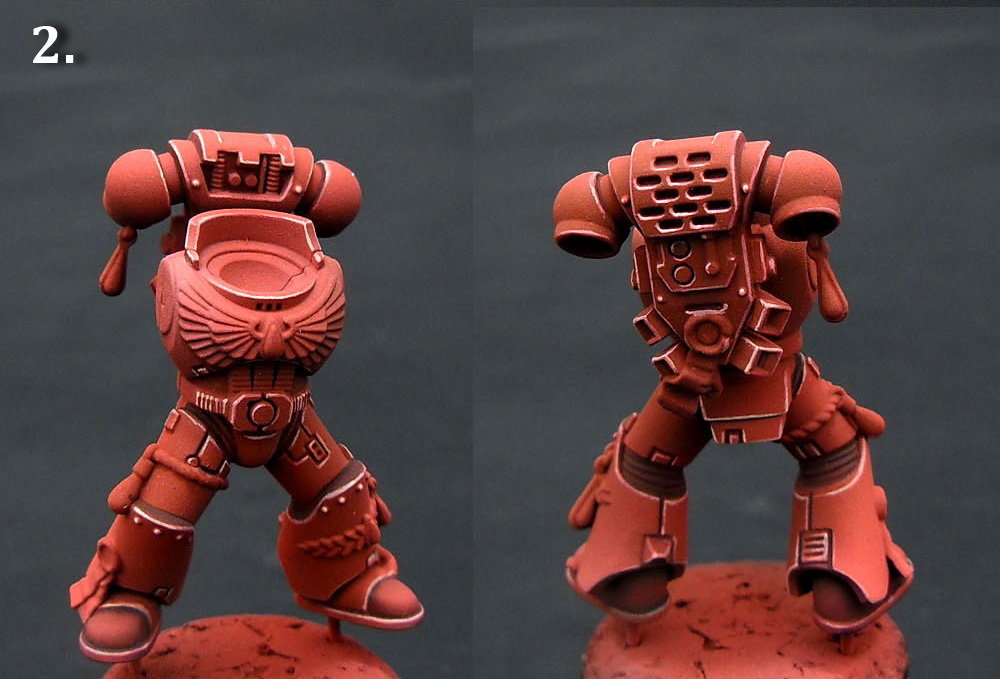
Phase two:
Second step is to make shading ad highlights on the edges.
To make shades you’ll need to mix Napoleonic Red (or your other base red paint) with black. It’s really simple, just keep your paint not too thick. Precision is the key but I can’t do much about it for you. Just practice and it’ll be easier. :)
Second thing are highlights. Don’t try to make everything at once. You’ll net at least two layer to make edges look neat. Edge highlight should be as thin as possible. When it’s possible paint with edge of your brush. Of course not every part is easily accessible. Sometimes you’ll need to be just patient and careful. First layer should be you base red mixed with white and second just white.
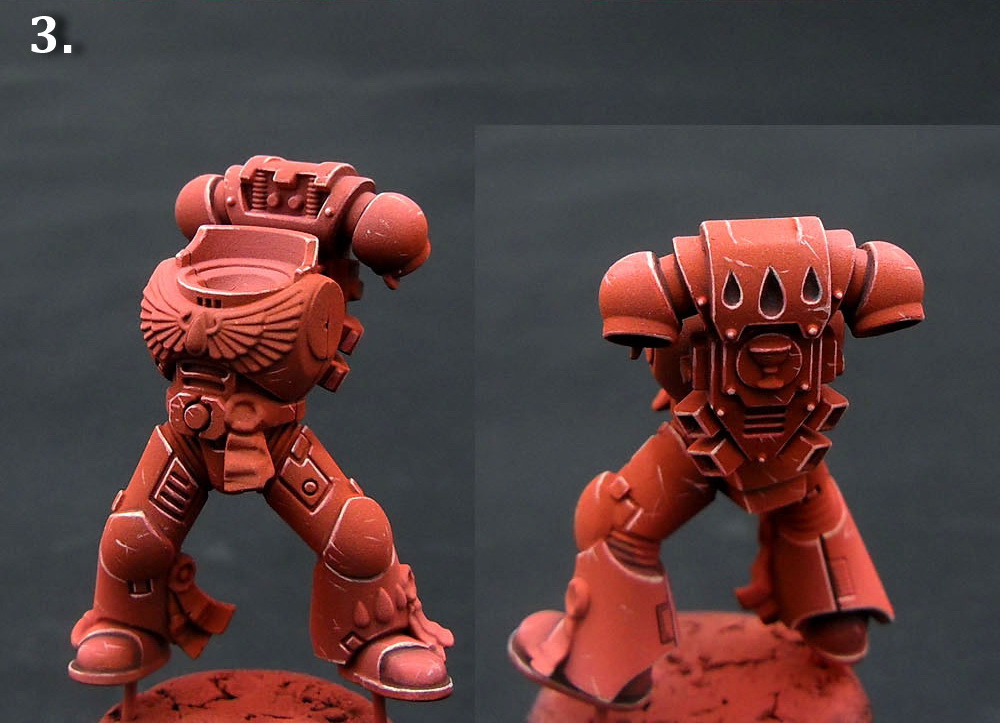
Phase three:
Okay, you already have nice armour but it’s too nice and shiny. Time to make some scratches!
First of all use thin brush, size 0 is usually enough. Although if it’s more comfortable for you use even thinner ones.
Hard thing in this step is to maintain just right paint consistency. It can’t be too much diluted as well as too thick. You can practice on paper if you don’t feel confident with it.
Remember about three things:
- Make a lot of scratches
- Every scratch should be brighter than base colour.
- Don’t use only one tone.
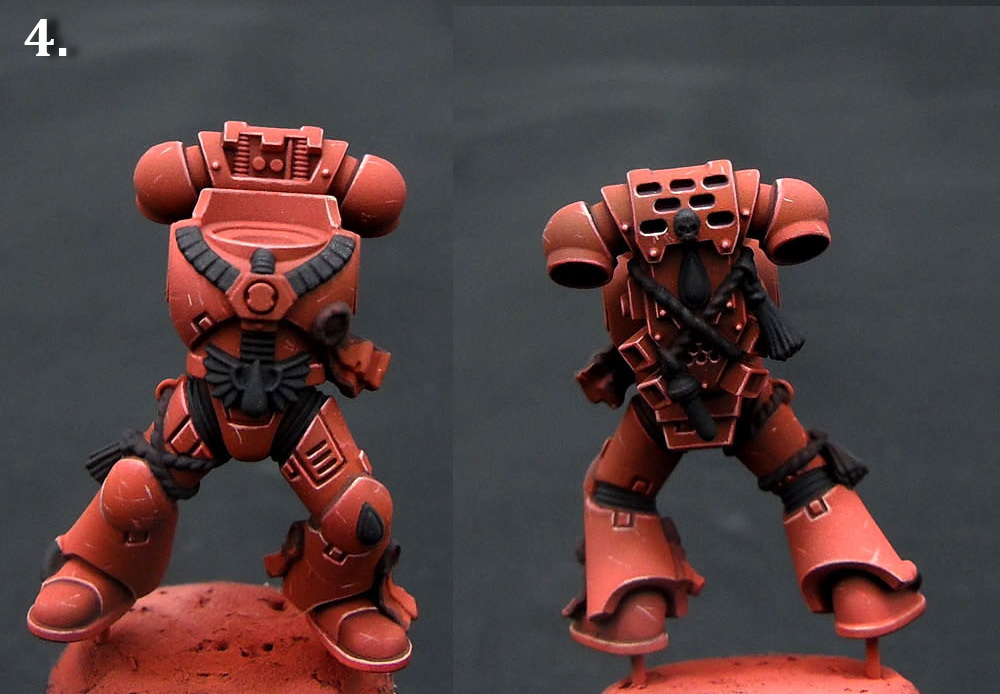
Phase four:
Another base coating phase. This time only with brush and only for black details.
Use only black paint. Be precise and add enough water to you paint. If any part miss black lining at this point it’s good idea to paint it at this phase.
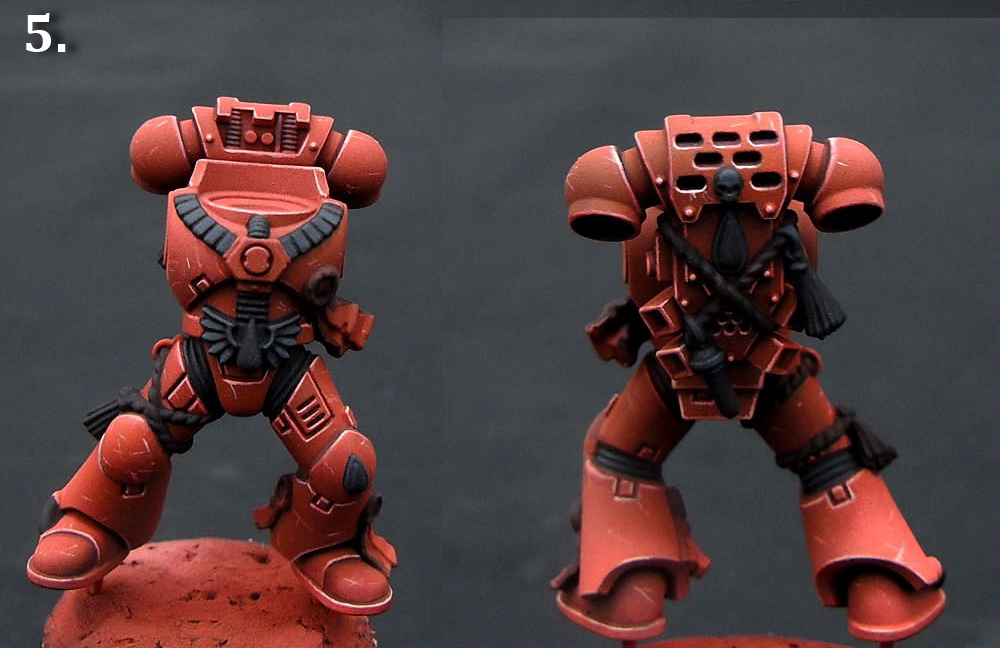
Phase five:
Last thing to do is to highlight all those black elements you just base coated. You’ll need proper mix to start this process. Take you black base paint mix it with a little bit of white and add some blue or turquoise.
Then just start to paint highlights. :)
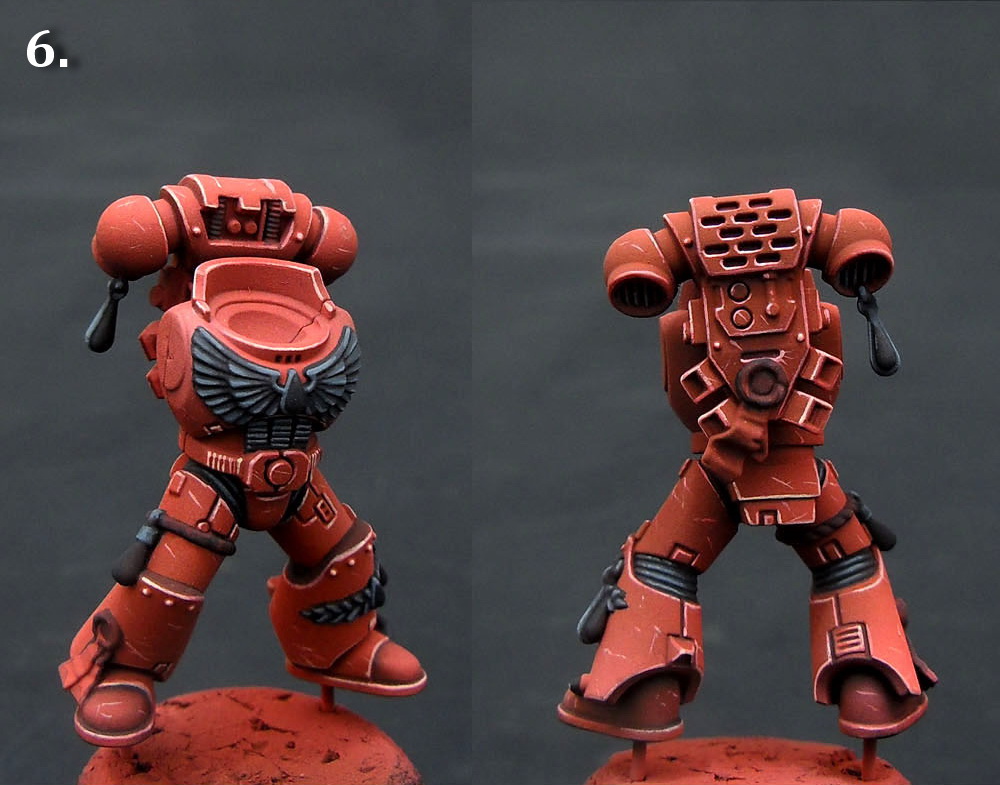
Phase six:
Add white to your original mix and paint another layer of highlights.
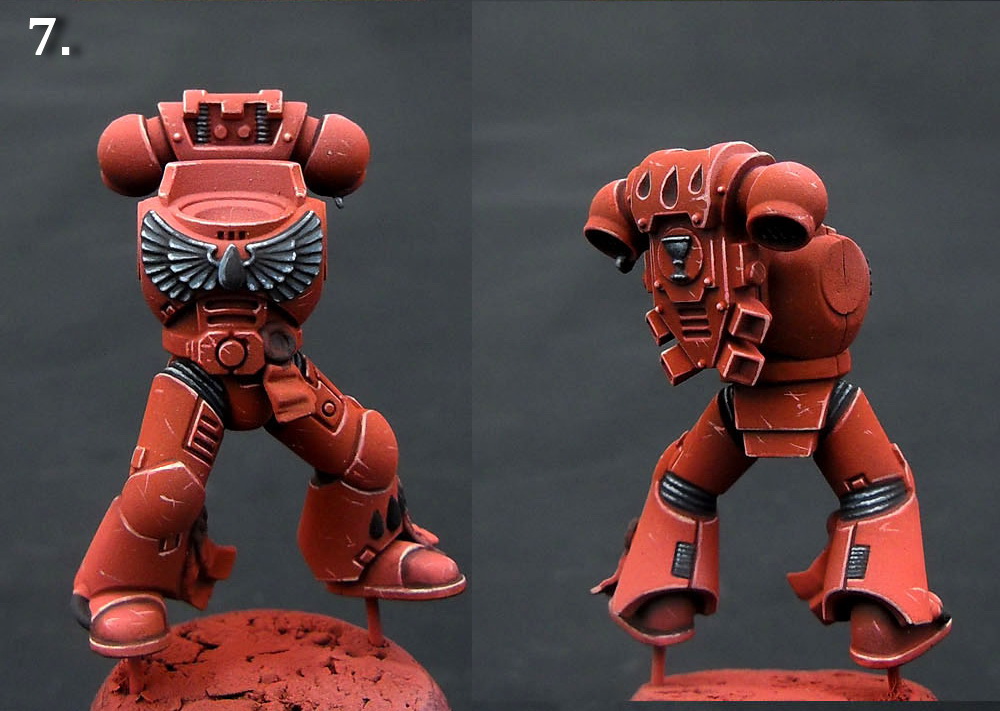
Phase seven:
Paint the tiniest final highlights on all black elements. Your power armour is done. The end!
Of course, you still need to paint remaining details like purity seals etc. :)
I hope it help you with your own Blood Angels. Please let me know what you think.
This is the best color scheme I saw for the blood angels. By far.
It is so true that I sent you a message to your email address regarding a possible Space Hulk commission.
It’s a long shot but it’s worth it.
Congrats!
Would it be too much to ask you which brand and type of primer and colors (base and highlights) you used?
You already talked about the “Napoleonic red” from Andrea but what about the others (white, black, blue/turquoise,…)?
Are they all part of the Andrea “New acrylic colors” or are they part of the Andrea “Color Paint Sets”?
Maybe are you mixing the brands?
Thank you for your answer as I try to follow your “how to” as precisely as possible.
Right now I’m using the Citadel paints but I’m not happy with their red and black at all.
Yours are fantastic and I would really like to know which ones they are.
Regards.
The are exact paints used:
Red – http://goo.gl/D5iFNo
Turquoise – http://goo.gl/oFDRIZ
Black – http://goo.gl/OJPbDf
White – http://goo.gl/x4a6dp
Sometimes we’re mixing brands but this time everything was from Andrea.
Thank you for the information in regards to the paints and technique but the main question that I have is, I’m just about to buy an Airbrush so I can attempt to do this to my army however Is there a certain AirBrush gun you recommend as in what size nozzle tip do I need and what size compressor what I need thank you again for answering these questions.